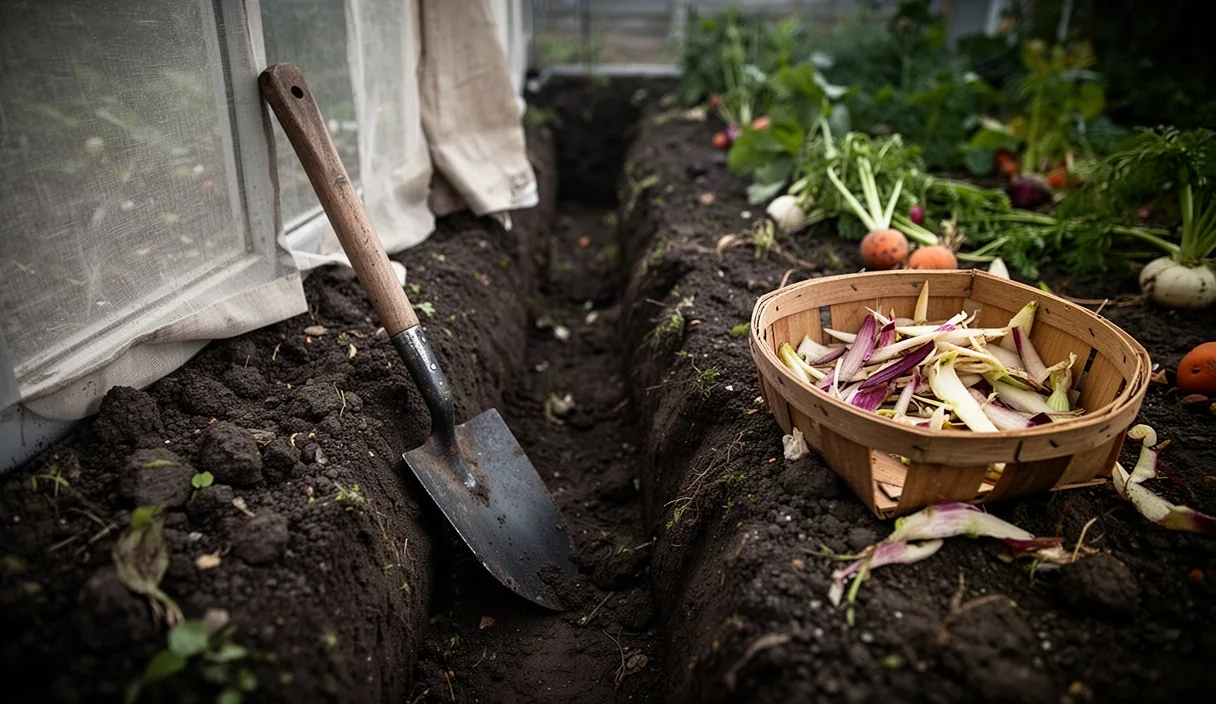
When the winter frost finally lifts off the heavy loam, our instinct across the allotment plots is to turn the surface and clear out last year's debris. Yet surface piles often sit cold for months, waiting for warm sunshine that might not arrive until late May. Trench composting takes a completely different path by using the earth itself as an insulated digestion chamber. Instead of turning heaps in the damp wind, you deposit raw kitchen trimmings and tough garden residue right where your most demanding crops will feed later in the season.
This method belongs to an older, quiet tradition of trenching runner beans and squash, burying trimmings deep under the central furrow so soil biology can work uninterrupted beneath the frost line. For heavy feeders like winter squash, beefsteak tomatoes, leeks, and sweetcorn, this underground cache acts as an active sponge. By feeding the subsoil months before planting, you build moisture retention and steady nutrition right where taproots and deep lateral feeders travel during the height of summer.
Understanding subterranean decomposition beneath planting beds
Decomposition underground behaves differently from an open heap exposed to the air. In a conventional slatted bin, aerobic bacteria rely on regular turning to supply oxygen, producing heat that can spike above sixty degrees Celsius before cooling down. Buried under twelve inches of topsoil, oxygen levels are lower, but moisture remains remarkably constant. The breakdown shifts from fast, heat-driven bacterial action toward a slower, fungal and earthworm-mediated digestion. Annelids, particularly deep-burrowing nightcrawlers, migrate directly into the trench, pulling organic debris into their burrows and coating the surrounding soil with mineral-rich casts.
Because the organic matter is buried, volatile nitrogen compounds that usually escape into the atmosphere as ammonia gas are absorbed directly by the surrounding soil particles. The damp earth seals in moisture, preventing the dry pockets that frequently halt decomposition in aboveground bins during dry spring spells. As the buried vegetation breaks down, it creates a subterranean sponge composed of raw humic compounds. This reservoir holds gravitational water while preserving small air channels created by worm activity.
For heavy-feeding crops, the physical structure of the buried trench solves the perennial problem of summer drought stress. Tomatoes and pumpkins consume copious amounts of water while developing their fruit, often draining the top four inches of soil within hours of irrigation. A subterranean trench acts as an underground capillary wick, drawing moisture from the surrounding subsoil and keeping root systems cool when July temperatures bake the bed surface dry.
| Factor |
Surface Heap Composting |
Subterranean Trench Composting |
| Decomposition Temperature |
High heat (fifty to sixty-five degrees Celsius) |
Ambient soil temperature (ten to twenty degrees Celsius) |
| Dominant Decomposers |
Thermophilic bacteria, aerobic microbes |
Earthworms, enchytraeids, saprophytic fungi |
| Nitrogen Retention |
Moderate; some lost to atmosphere through volatilization |
High; trapped directly by adjacent soil minerals |
| Moisture Maintenance |
Requires manual watering and cover management |
Retained naturally by surrounding earth walls |
| Labour Requirement |
Frequent mechanical turning and aeration |
One-time digging and backfilling |
Selecting appropriate kitchen trimmings and garden waste
Success beneath the soil depends on choosing materials that break down without putrefying into an anaerobic slime. Kitchen scraps with balanced moisture and structure work best. Brassica stalks, carrot peelings, apple cores, spent tea leaves, and coffee grounds decompose cleanly in buried environments. Crush eggshells before tossing them in, as whole shells take years to break down and do not integrate well into the root zone. Garden wastes like chopped comfrey leaves, spent nettles, pea vines, and faded annual flower stems provide an ideal mix of cellular structure and plant-available minerals.
Avoid burying dense, oily, or cooked kitchen scraps directly beneath future planting rows. Fats, dairy rinds, and meats attract burrowing rodents such as rats and field mice, who will tunnel through your garden beds to reach them. Additionally, keep perennial weed roots like couch grass, bindweed, and creeping buttercup far away from the trench. The lack of thermophilic heat underground means these stubborn roots will not die; they will simply wake up, absorb the moisture, and colonize your bed from beneath.
- Ideal materials: Vegetable peelings, crushed eggshells, spent coffee grounds, wilted comfrey, chopped straw, shredded unbleached cardboard, green garden trimmings.
- Acceptable in small amounts: Citrus rinds cut into small squares, stale bread, damp autumn leaves, soft lawn clippings mixed thoroughly with brown matter.
- Strictly avoid: Dog or cat manure, whole animal fats, cooked bones, diseased potato foliage showing blight, seed heads of persistent annual weeds like hairy bittercress.
Woody stems thicker than a pencil require too much time and draw excessive nitrogen from the soil during initial fungal colonization. If you include sunflower stalks, sweetcorn canes, or brassica cores, smash them thoroughly with the back of an axe or run them through a garden shredder before introducing them to the trench. Smaller surface areas allow fungal mycelium to envelop the fibres quickly, preventing the nitrogen robbery that can stunt young vegetable roots months later.
Digging the trench to the proper depth along bed centres
Timing the excavation is just as critical as the digging itself. The best window falls between late autumn and early spring, roughly four to twelve weeks before you plan to set out transplants. Digging in late February or March gives the local soil fauna enough time to consume the freshest scraps before young plant roots arrive. Avoid digging when the soil is waterlogged or frozen solid; compacting wet clay by standing on the bed edges will damage soil structure for the entire growing season.
To begin, mark a straight line down the centre of your planting bed using two wooden stakes and garden twine. Heavy feeders are typically planted along this central axis, allowing lateral roots to reach into the margins while the central root system dives directly into the trench. Strip away the top four inches of fertile topsoil and set it aside on a canvas tarp to the left of the bed. This nutrient-dense top layer contains the active soil microbiome and should always be reserved for the final surface cover.
Excavate the trench to a uniform depth between twelve and eighteen inches. Digging shallower than twelve inches risks attracting surface pests and can burn tender young roots with fresh, unfermented acids. Digging deeper than eighteen inches places the organic matter down in anaerobic subsoil where earthworms rarely venture and oxygen is scarce. Keep the trench width between ten and fourteen inches across, creating vertical walls that will support the surrounding bed walls without collapsing during rain.
Loosen the floor of the trench with a sturdy garden fork, thrusting the tines down another six inches without turning the subsoil up. This critical step breaks up any hardpan or clay compaction beneath the trench floor, ensuring that heavy spring rains drain freely rather than pooling into a stagnant, sour puddle underneath your buried scraps.
Layering organic material with garden soil and dry leaves
Building a subterranean compost trench is an exercise in thin, deliberate layers rather than dumping a concentrated heap into a pit. A deep mass of pure kitchen waste will quickly mat together into a foul, foul-smelling layer that repels root growth. Aim to create an alternating sandwich of green, nitrogen-rich materials and dry, carbon-rich materials, balanced with regular dustings of garden soil.
Begin with a base layer of coarse brown material across the loosened trench floor. Two inches of shredded autumn leaves, straw, or torn cardboard creates an aerated cushion that absorbs juices dripping down from above. Over this base, scatter your first layer of green kitchen scraps and garden trimmings, keeping this deposit no more than three inches thick. Sprinkle a handful of wood ash or rock dust over the greens if your soil runs acidic, which aids fungal growth and provides trace minerals.
Follow the green layer with a thin, one-inch dusting of the garden soil you set aside on the tarp. This introduces native bacteria, actinomycetes, and fungal spores directly onto the surface of the fresh food scraps, jumpstarting the breakdown process immediately. Repeat this alternation: three inches of carbon, three inches of nitrogen waste, and a dusting of native soil, until the trench is filled to within four inches of the garden surface level.
Finally, cap the trench completely with the reserved topsoil, mounding it slightly above the surrounding bed level by two or three inches. Over the next six to eight weeks, the subterranean volume will shrink significantly as earthworms digest the matter and air pockets collapse. The initial mound prevents a sunken depression from forming along the centre of the bed, which would otherwise collect standing water and rot your future crop stems during wet June weather.
Planting directly above the settled trench in early summer
By late May or early June, the ground has warmed, and the organic materials beneath the bed centre will have transitioned into a dark, crumbly, sweet-smelling layer. You can confirm readiness by inserting a long trowel into the centre line. If you pull up identifiable, putrid scraps of food, the bed needs another two or three weeks to mature. If the soil smells like damp woodland floor and scraps have lost their distinct shapes, conditions are ideal for planting.
Heavy feeders thrive with their root systems positioned just above, rather than directly inside, the active decomposition zone. When transplanting squash, marrow, outdoor cucumbers, or cordon tomatoes, dig your planting hole into the top four to six inches of settled topsoil, directly over the trench line. This placement allows the young plant to establish its fine root system in stable, neutral garden soil before sending heavy anchor and tap roots downward into the nutrient-dense compost band below.
Space your crops according to their mature needs, taking advantage of the concentrated fertility line beneath them:
- Winter squash and pumpkins: Space plants thirty-six to forty-eight inches apart along the trench. Their aggressive root systems will follow the moisture band down the entire length of the bed.
- Cordon tomatoes: Plant twenty-four inches apart. Anchor strong stakes or cane tripods along the edges of the trench rather than driving them through the centre, which can compact the loose subterranean layer.
- Sweetcorn: Plant in a tight, double-staggered row twelve inches apart over the trench. The massive root anchors will lock into the spongy compost layer, holding tall stalks upright against heavy winds.
- Runner beans and climbing French beans: Plant nine inches apart along a double A-frame, positioning the root balls six inches on either side of the central trench line.
Water transplants thoroughly immediately after setting them into the bed. The water settles the loose soil around the root ball and establishes capillary connection with the decomposing sponge below. Once established, you will notice that crops planted over a trench require significantly less surface irrigation throughout the dry months, as their roots remain cool and hydrated from below.
Common mistakes
The most frequent error in trench composting is making deposits too shallow. Leaving raw scraps within four or five inches of the surface invites neighborhood foxes, badgers, and dogs to excavate your garden beds overnight. Always maintain a firm buffer of at least seven inches of compacted soil between the highest layer of scraps and the air above.
Another common mistake is burying thick carpets of fresh lawn clippings without mixing them with dry brown matter. Clippings contain high levels of moisture and nitrogen; when compacted together in a trench without air, they turn into a dense, sour mat that generates toxic amounts of methane and resists root penetration. Always toss grass clippings with equal volumes of dry leaves, chopped straw, or shredded brown paper bags before adding them to the trench.
Finally, avoid planting too early over an unseasoned trench. If tender greenhouse-raised transplants are placed into soil where fresh organic waste is actively fermenting, the rapid microbial activity consumes available nitrogen around the root ball, causing young plants to turn pale yellow. If your planting schedule is tight and the trench is fresh, set transplants eight inches to the side of the trench line rather than directly on top of it, allowing roots to grow inward as the breakdown completes.
Practical next steps
To bring this subterranean composting method into your garden this season, take these specific steps over the coming weeks:
- Designate your bed: Identify the specific bed reserved for this summer's heaviest feeders, such as courgettes, winter squash, or tomatoes, ensuring it receives at least six hours of direct sunlight daily.
- Collect carbon storage: Gather two bags of dry autumn leaves, chopped straw, or plain shredded cardboard and store them dry near the bed to ensure you have balancing brown material ready.
- Dig the furrow: Take advantage of a mild, dry weekend to dig the central trench fourteen inches wide and fifteen inches deep, banking the topsoil neatly on a tarp beside the bed.
- Fill and record: Deposit kitchen trimmings and chopped garden waste in thin layers balanced with dry browns and native soil dustings over a two-week period until filled within four inches of the top.
- Cap and settle: Cover the filled trench with the banked topsoil, mounding it three inches high, and allow the bed to rest undisturbed for six weeks before setting out your summer transplants.
This publication provides general horticultural guidance only: consult your municipal extension office or a certified arborist for persistent orchard blights and soil contamination concerns. Disclaimer