By the second week of February, the frost still clings stubbornly to the garden gate, and the rain off the inlet turns the gravel drive into slick mud. Inside the back porch or beside the cellar boiler, however, the real growing season starts in quiet miniature. Hot peppers, particularly slow-growing varieties of Capsicum chinense like Habaneros and Scotch Bonnets, demand an early start if they are to produce heavy branches of fruit before the autumn mists settle back over the allotment. Waiting until the soil outside warms up in May guarantees disappointment, leaving you with bushes full of immature green marbles when the first hard October frost arrives.
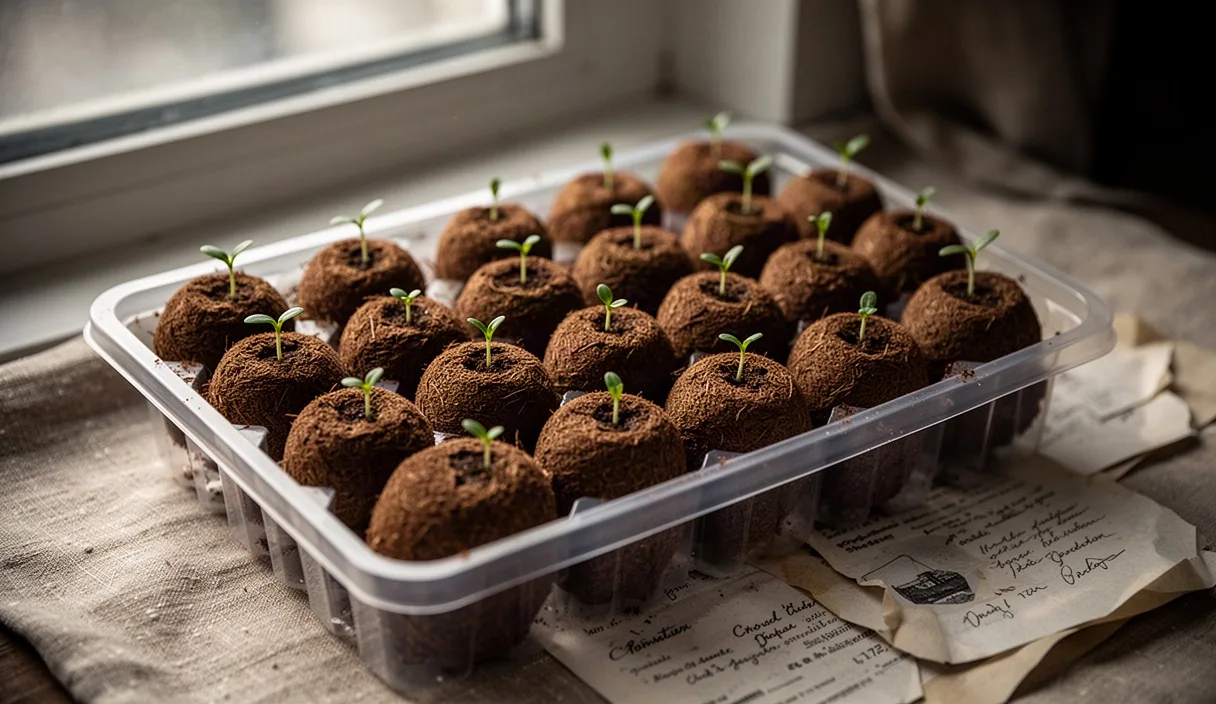
Compressed coconut coir plugs offer an exceptionally tidy, reliable medium for waking these stubborn tropical seeds. Coir holds a balanced ratio of moisture and oxygen far better than garden compost or heavy peat mixes, which tend to slump and suffocate delicate embryos when kept wet for three weeks. Yet coir is also chemically inert, meaning it brings no native fertility and possesses unique cation exchange quirks that catch unwary growers off guard. Achieving dependable germination requires understanding how to temper the coir, dial in steady heat, and avoid the stagnant air that invites damping-off fungus to wipe out an entire tray overnight.
Why hot peppers demand steady bottom warmth to break dormancy
Pepper seeds originated in equatorial river basins and tropical uplands where soil temperatures rarely dip below 75 degrees Fahrenheit. Unlike brassicas or hardy greens that will push roots through chilling 50-degree mud, a pepper seed sits completely dormant in cold soil. If exposed to damp, cold conditions below 65 degrees for more than a few days, the seed coat softens while metabolic processes remain stalled. Soil bacteria and opportunistic water moulds penetrate the protective casing long before the radical can emerge, rotting the embryo from the inside out.
For standard sweet peppers and everyday Capsicum annuum varieties like early Jalapenos or Cayennes, a consistent temperature between 78 and 82 degrees Fahrenheit triggers rapid cell division. The hotter varieties belonging to Capsicum chinense, such as the Carolina Reaper, Ghost, and Moruga Scorpion, alongside stubborn Capsicum baccatum landraces, prefer temperatures held steady between 82 and 86 degrees Fahrenheit. At these higher ranges, enzyme activity peaks, breaking down the stored starches within the seed endosperm to feed the emerging sprout.
Relying on ambient room air or a sunny windowsill will not work during the damp, dark weeks of late winter. Windowsills fluctuate wildly, dipping into the low 50s at night and baking briefly when midday sun strikes the glass. A dedicated waterproof heat mat governed by a remote digital thermostat probe is necessary. Insert the brass or stainless steel probe directly into the centre of a representative coir plug in the middle of your tray, not into the open air above it. This ensures the heating elements cycle based on actual root-zone temperature rather than the shifting drafts of your kitchen or basement.
| Pepper Species and Common Varieties |
Optimal Root-Zone Temperature |
Typical Days to Emergence |
| Capsicum annuum (Jalapeno, Bell, Poblano) |
78 to 82 degrees F (25 to 28 C) |
7 to 12 days |
| Capsicum baccatum (Aji Lemon, Bishop's Crown) |
80 to 84 degrees F (26 to 29 C) |
10 to 18 days |
| Capsicum chinense (Habanero, Scotch Bonnet, Ghost) |
82 to 86 degrees F (28 to 30 C) |
14 to 28 days |
| Capsicum pubescens (Rocoto, Manzano) |
72 to 78 degrees F (22 to 25 C) |
14 to 21 days |
Hydrating and buffering compressed coconut coir plugs
Dry, compressed coir pellets or plugs are made from the fibrous mesocarp of coconut husks. While they are celebrated for their sustainability and light structure, raw coir naturally contains high concentrations of sodium and potassium ions bound tightly to its complex cation exchange sites. If you hydrate these plugs with plain tap water, the coir naturally draws in calcium and magnesium while releasing sodium and potassium salts into the surrounding moisture. This creates an invisible nutritional lock, robbing early root tissues of the calcium they require for strong cell walls.
Before any seed touches the plug, you must hydrate and buffer the material. Use clean water warmed to approximately 105 degrees Fahrenheit. Warm water breaks down the dried binders and expands the compacted fibre three times faster than cold tap water. Mix a balanced calcium-magnesium supplement into the warm soak water at a rate of 2 millilitres per litre of water. Allow the dried plugs to float and expand in this solution for a full 25 minutes. As the coir fibers drink up the liquid, calcium ions actively displace the residual sodium, creating an optimal, non-toxic root environment.
Once fully expanded, pick up each plug and check its density. You want the coir spongy and completely expanded, but not dripping like a saturated kitchen sponge. Coir holds a notable volume of air even when damp, but if the plug is swimming in water, the seed will suffocate. Give each plug a gentle, deliberate squeeze between thumb and forefinger until water stops running in a stream and only produces a few stray drops. Arrange the hydrated plugs snugly into the cells of your propagation tray, making sure the top surfaces sit level so seeds cannot roll down the sides.
Sowing seeds at the correct quarter-inch depth
Pepper seeds require dark, sustained contact with moist fibers to break their leathery seed coats, known botanically as the testa. Sowing too shallow leaves the emerging seedling vulnerable to drying out, often resulting in a crippling condition where the seed casing remains stuck over the cotyledons like a tight helmet. Sowing too deeply, on the other hand, exhausts the seed's small energy reserves before the hypocotyl hook can push upward into the light.
A consistent depth of one-quarter inch (approximately 6 millimetres) is ideal across nearly all pepper varieties. Follow this step-by-step method to ensure uniform placement across the entire tray:
- Inspect the pre-drilled central dibble hole in your expanded coir plug. Factory holes are frequently pressed too deep, sometimes plunging half an inch down. Pinch a tiny pinch of loose coir fiber from the corner of a plug and drop it into the hole to raise the floor until it sits exactly one-quarter inch below the rim.
- Place two seeds onto the surface of the hole in each plug. Planting two seeds protects against natural germination failures; if both emerge, you can clip the weaker stem at the base with sharp embroidery snips two weeks later.
- Press the seeds lightly against the coir using the flat, blunt end of a pencil or a wooden skewer. Good capillary contact between the moist fibers and the seed surface is critical for moisture transfer through the seed coat.
- Tuck loose coir over the seeds to fill the depression level with the rest of the plug. Press down very gently with your index finger to settle the medium. The coir should feel firm enough that water cannot displace the seed, but never packed rock-hard.
- Mist the surface with three pumps of a fine-mist hand sprayer filled with lukewarm, clean water to settle the covering material into place.
Managing moisture beneath plastic domes without fostering mould
Because hot pepper seeds can take anywhere from 10 to nearly 30 days to emerge, maintaining stable humidity is an exercise in restraint. A high-dome clear plastic propagation cover preserves the humid microclimate generated by the heat mat below, stopping the plugs from drying out into hard, brown cork. However, this same warm, wet, stagnant air serves as a breeding ground for white mould, fungal gnats, and Pythium species that cause stem collapse.
The goal is to maintain relative humidity between 75 and 85 percent directly above the plugs while encouraging subtle air movement. Inspect the inside surface of your humidity dome daily. A fine, even haze of tiny moisture droplets across the plastic is healthy. Large, heavy drops of water that gather, run down the sides, and drip continuously onto the coir plugs indicate excessive moisture. Dripping water saturates the top of the plug, cools the seed, and knocks loose coir off the planted hole.
If you see heavy droplets, open the adjustable vents on the top of your dome by one-third. If your dome lacks vents, prop one corner of the tray open by roughly one-quarter inch using an ordinary wooden clothes peg. Once every morning, lift the dome completely, flip it over to shake out excess standing moisture onto a clean towel, and let the open tray breathe room air for roughly 90 seconds before replacing the lid. Avoid watering the plugs from above with a watering can during this period. If a plug appears pale brown and dry around the edges, add warm, buffered water directly to the bottom of the outer tray, allowing the coir to wick up moisture from below for 20 minutes, then drain away all standing runoff.
Introducing gentle light the instant germination begins
While pepper seeds do not require light to trigger germination, the pale green stem hook needs immediate illumination the moment it breaches the coir surface. Delaying light by even 24 hours forces the seedling to rapidly stretch its hypocotyl toward any stray light in the room, creating weak, spindly, pale stems that will lean, flop, and struggle under the weight of their first true leaves.
Check the seed tray twice daily once you pass the seventh day after sowing. As soon as you spot a single green or purplish loop of stem emerging through the coir, that cell must receive light. If you are starting multiple varieties in one flat, the sweet peppers will inevitably hatch days before the super-hots. Do not leave the early bloomers sitting in the dark under a foggy dome waiting for the stragglers.
Suspend a modern full-spectrum LED or high-output T5 fluorescent grow light directly over the seedlings. Set your light timer for an uninterrupted cycle of 14 to 16 hours of light followed by 8 to 10 hours of darkness. The distance between the lamp and the tops of the plugs must be calibrated carefully based on fixture intensity:
- For standard T5 fluorescent fixtures, position the bulbs between 2 and 4 inches above the top of the seedlings. These lights run relatively cool and must stay close to deliver adequate photon density.
- For modern broad-spectrum LED bar fixtures, hang the lights between 10 and 14 inches above the plugs. If your fixture features an adjustable dimmer, set the output to roughly 40 percent power during the first week of emergence, stepping it up gradually as true leaves form.
- Remove the humidity dome entirely from under the light as soon as half of the plugs have sprouted. Seedlings need the drier ambient air of the room to pull water and nutrients through their vascular systems via transpiration.
Common mistakes
Starting peppers in coir can stumble on small, overlooked details. Avoid these frequent pitfalls to protect your seed investment:
- Letting the bottom heat run uncontrolled: Heat mats without thermostatic controls can reach temperatures over 100 degrees Fahrenheit when placed on cold floors. This will cook the embryos within a week. Always use a dedicated temperature controller with an in-plug probe.
- Over-saturating the coir: Coir retains water stubbornly. If water pools in the bottom of your plug tray cells, the plugs remain waterlogged, cutting off oxygen and leading to root die-back before the plant even drops its seed cap.
- Feeding synthetic fertilizer too early: The cotyledons contain all the initial nutrition the seedling needs. Applying full-strength liquid fertilizers to unrooted plugs causes fertilizer burn on root tips and encourages green algae growth on top of the coir. Hold off on any light feeding until the first set of true, jagged leaves appears.
- Pulling stuck seed coats by force: If a seedling emerges with the seed coat clamped over its leaves, do not rip it off dry. You will snap the embryonic head off the stem. Instead, place a drop of warm water onto the seed coat with your fingertip, wait ten minutes for the husk to soften, and coax it off gently with tweezers.
Taking the next steps from plug to pot
Once your pepper seedlings have stood upright, shed their seed casings, and flattened their smooth cotyledons into horizontal paddles, their environmental needs shift. Turn off the bottom heat mat entirely if your indoor space stays above 68 degrees Fahrenheit during the day. Keeping the root zone constantly hot after emergence encourages leggy, soft growth rather than thick, woody main stems.
Keep a close eye on the drain holes at the bottom of each coir plug. Within 14 to 20 days after emergence, bright white, fibrous root tips will poke out through the bottom and sides of the plug material. This is your cue to pot up. Prepare small individual containers, such as three-inch plastic pots or soil blocks, using a well-aerated potting mix containing perlite and balanced compost. Gently ease the coir plug out of its propagation cell, taking care not to pinch the delicate root collar, and seat the entire plug into the new potting soil, burying the stem just up to the base of the cotyledons.
Water the new pots thoroughly with a mild nutrient solution mixed at one-quarter strength, ensuring your water temperature is tepid. Place the potted seedlings directly back under your grow lights, maintaining your 14-hour cycle and keeping an oscillating fan running on its lowest setting across the room. That subtle, gentle air movement strengthens the stems, thickens cell walls, and prepares your young peppers for the long, bountiful summer ahead.
This publication provides general horticultural guidance only: consult your municipal extension office or a certified arborist for persistent orchard blights and soil contamination concerns. Disclaimer